Iphone Error Collection With Solution
Errors -9815
Set exact date, restart computer. See also Apple's KB article.
Errors -9814
Set exact date, restart computer. See also Apple's KB article.
Errors -9800
Set exact date, restart computer. See also Apple's KB article.
Error -50
Delete Storm Vedio, QuickTime, iTunes, then reinstall iTunes. See also Apple's KB article.
Error -35
See Apple's KB article.
Error 1
Unable to downgrade. Try changing the USB port (the back one of chassis is better) and restart computer.
The installed version of iTunes may also be too old. Update iTunes.
Error 2
Sn0wbreeze 1.6 Custom Firmware has a ASR patch problem. Use sn0wbreeze 1.7 or PwnageTool. Device isn't bootable.
Error 6
Not enter the downgrading mode, change USB port (the back one of chassis is better) and restart computer.
Error 10
LLB is missing from the IPSW. The device cannot be booted up. The trick to skip the baseband update no longer works.
Error 11
Removed bbfw file in the firmware folder of an unzipped IPSW.
Error 13
Occurs when you want to install a beta firmware with iTunes for Windows (actively blocked by Apple; beta users are developers and therefore must have a Mac).
Error 13 may also signify a USB problem. Check the USB connection and try other direct ports or maybe the USB cable is an older one. Device isn't bootable.
Error 14
Custom firmware update fail (PwnageTool). You have to restore the device with a custom firmware. Update to a custom firmware isn't working. Device isn't bootable. 2
USB Problem. Check the USB connection and try other direct ports or maybe the USB cable is an older one. Device isn't bootable.
Error 17
Custom firmware update fail (sn0wbreeze). You have to restore the device with a custom firmware. Update to a custom firmware isn't working. 2
Error 20
Searching correct fault.
Error 23
Searching correct fault.
Error 26
False version of the NOR flash firmware. Use the correct sn0wbreeze version.
Error 29
See Apple discussions thread about this problem.
Error 37
iPod touch 2G LLB patched with the 0x24000 Segment Overflow was used on an iPhone 3GS custom firmware. Known on damaged bundles from unofficial PwnageTool distributions or bundles.
Error 1002
Are you restoring to a stock apple firmware or a custom pwn firmware? Either way make sure you are in DFU mode first.
Error 1004
This is caused by a failure to match the Baseband Nonce currently in memory to the Nonce returned in the BasebandFirmware SHSH blob. This is a normal part of iPhone 4 local restores via TinyUmbrella. 1
Error 1013
Restart computer; change computer; reinstall system, if iPhone is always in restoring mode: XP users can jump from restoring mode with ibus; MAC users can use iNdependence. (usually on the iPhone with 1.0.2 firmware downgraded from 1.1.1)
Error 1014
This error is down to itunes not liking your USB ports on your computer. Use a different USB slot or a different computer if possible. That is the easiest fix!
Error 1015
Restart computer; change computer; reinstall system, if iPhone is always in restoring mode: XP users can jump from restoring mode with ibus; MAC users can use iNdependence. (usually on the iPhone with 1.1.1 firmware downgraded from 1.1.2) Baseband firmware on the IPSW is higher than the baseband firmware on the iPad/iPhone. 1
Error 1413
Restart computer; change USB port; reinstall system. See also Apple's KB article.
Error 1415
Restart computer; change USB port; reinstall system.
Error 1417
Restart computer; change USB port; reinstall system.
Error 1418
Restart computer; change USB port; reinstall system.
Error 1428
Restart computer; change USB port; reinstall system.
Error 1600
Custom firmware can't be restored on a device with DFU Mode. Use Recovery Mode.
Error 1602
Restart computer; change computer; reinstall system.
Error 1603
False kernelcache patch. Known on damaged bundles from unofficial PwnageTool distributions or bundles. See also Apple KB article
Error 1604
Device was not pwned (signature checks were not blocked). Custom firmware can't be restored.
Error 1611
iTunes tried to enter the Restore Mode, but the device turned back to the Recovery Mode.
Error 1619
iTunes is too old and couldn't read the iPhone in Recovery or DFU Mode. Please update iTunes and try it again.
Error 1644
IPSW was moved during prepare with iTunes. Try it again and don't move the IPSW.
Error 2002
iTunes can't connect because another program is using it or it's disconnected during the Apple Server check.
Error 3XXX
iTunes can't connect to gs.apple.com. Maybe Port 80 and Port 443 is blocked. Open it on your router.
Error 3002
Update to an older firmware isn't working, because Apple is no longer handing out SHSHs for the device/firmware combination.
Error 3004
No internet connection during the firmware restore.
Error 3014
False edited hosts. The SHSH request couldn't be completed. No connection to the Apple Server, Sauriks Server or localhost.
Error 3194
Occurs when trying to install an old firmware and Apple's server disallows the installation. The only solution is to have SHSH backup and modify the hosts file to point to Saurik's Cydia server where they are backed up (or localhost if you have it yourself).
Error 3195
"An internal error occurred." Missing SHSH for the firmware. Maybe the same as "This device isn't eligible for the request build." but with an cache error.
Error 11222
internet options Connections tab Click LAN Settings uncheck "use a proxy server"
0xE8000022
Searching..........
0xE800003D
False permissions in the Carrier Bundle folder. Restore, update or fix the permissions from the carrier bundle to update the carrier settings via iTunes.
0xE800006B
Device was suddenly unplugged. iTunes couldn't connect with the device. Try it again.
0xE8000065
sn0wbreeze custom cirmware error on USB connection. Unplug the device, reboot it, and plug it in again.


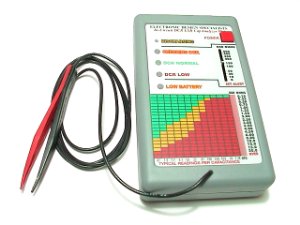
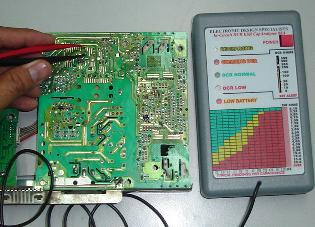 A must have high voltage probe if you repair computer monitor or tv
